


Who We Are

Mexican Petunias (Rooted)
Mexican Petunias (Rooted)
Mexican Petunias (Rooted)
Mexican Petunias (purple, pink & white) are quite easy to grow, they just need a minute to get established.
Upon receiving your plants, remove them from the Ziploc bag right away. Place them in a cup of water, covering the roots and ensuring the leaves remain dry and out of the water.
After your last frost date, place the cuttings in the
Mexican Petunias (purple, pink & white) are quite easy to grow, they just need a minute to get established.
Upon receiving your plants, remove them from the Ziploc bag right away. Place them in a cup of water, covering the roots and ensuring the leaves remain dry and out of the water.
After your last frost date, place the cuttings in the ground. Dig a hole a few inches deep in a sunny location, and back fill with soil. Press the soil down lightly to ensure good contact and plant support. A partially shady location will be suitable, but the more sun the plant gets, the more flowers you will see! Water the plants well, especially the first few days, continuing to water daily until you see new growth. New growth will occur not only in plant height and leaves, but additional stems will emerge.
As the plants get established, they will need less and less attention. Water during droughts and in extreme temperatures, or if they begin to wilt. No fertilizer is needed. They are tolerant of flood, drought, and many soil types.
The plants die off in cooler months, and they can be cut to the ground to remove the unsightly remains. They will come back in the spring in warmer zones (Zone 8 and below) with additional, stronger stems.
Our Expertise
Mexican Petunias (Rooted)
Mexican Petunias (Rooted)
These garden markers are the last ones you will need to buy. We use them for all of our labeled plants. You can write on them with pencil, crayon, nursery marker, paint pen, or grease pen, but we recommend labels (Brother P-Touch Labels) for a long term solution. Simply label the plant in whichever way you choose, and stick the double po
These garden markers are the last ones you will need to buy. We use them for all of our labeled plants. You can write on them with pencil, crayon, nursery marker, paint pen, or grease pen, but we recommend labels (Brother P-Touch Labels) for a long term solution. Simply label the plant in whichever way you choose, and stick the double posts several inches in the ground to remember exactly what you put beneath that soil.
Our Services
Mexican Petunias (Rooted)
Our Services
EARRINGS
We don't have much direction on what to do with your earrings, but here is some general guidance on what not to do to keep your jewelry clean and shiny!
The S's to Avoid for Proper Jewelry Care
Showers / Soaps / Scrubs
Sprays
Soil / Sun / Sunscreen
Sweat / Swimming
Sleep
Sports
SUGAR SCRUBS
These sugar scrubs are a treat for rough hands!
W
EARRINGS
We don't have much direction on what to do with your earrings, but here is some general guidance on what not to do to keep your jewelry clean and shiny!
The S's to Avoid for Proper Jewelry Care
Showers / Soaps / Scrubs
Sprays
Soil / Sun / Sunscreen
Sweat / Swimming
Sleep
Sports
SUGAR SCRUBS
These sugar scrubs are a treat for rough hands!
We recommend you wet your hands a bit to help spread the scrub around. Then, with your fingers, scoop a small amount out of your jar. Massage around your hands and fingers, even up to your wrists. Try them on your feet too! We do not recommend using these on your face or lips as the exfoliating properties are quite strong. When complete, just rinse off and you will be left with sweet smelling, smooth hands, or feet!
boutineer and corsage, add list of flowers dangerous for animals
Our Vision
Mexican Petunias (Rooted)
Our Services
Our vision at Fire Tower Flowers is to be the most reliable and trusted flower delivery service provider in the industry. We strive to provide a seamless and enjoyable experience to our customers by offering exceptional quality, creativity, and customer service. We believe in spreading happiness and joy through our beautiful floral arrangements.
Who We Are
Mexican Petunias (Rooted)
Mexican Petunias (Rooted)
Mexican Petunias (Rooted)
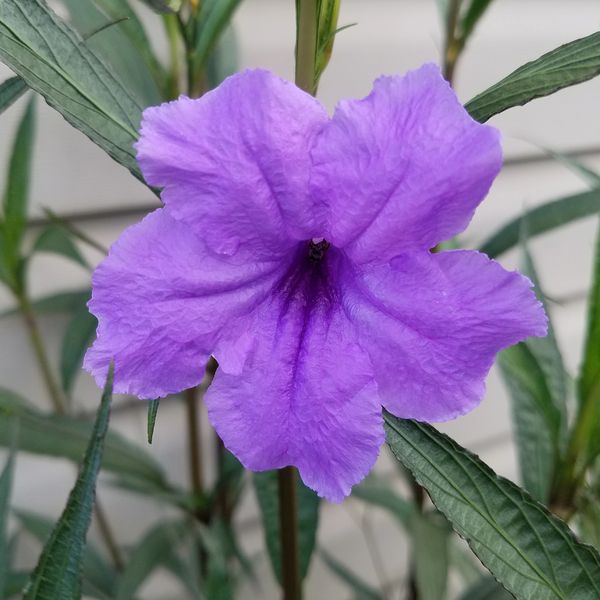
MEXICAN PETUNIA CUTTINGS
Mexican Petunias (purple, pink & white) are quite easy to grow, they just need a minute to get established.
Upon receiving your plants, remove them from the Ziploc bag right away. Place them in a cup of water, covering only the roots and ensuring the leaves remain dry and out of the water.
After your last frost da
MEXICAN PETUNIA CUTTINGS
Mexican Petunias (purple, pink & white) are quite easy to grow, they just need a minute to get established.
Upon receiving your plants, remove them from the Ziploc bag right away. Place them in a cup of water, covering only the roots and ensuring the leaves remain dry and out of the water.
After your last frost date, place the cuttings in the ground. Dig a hole a few inches deep in a sunny location, and back fill with soil. Press the soil down lightly to ensure good contact and plant support. A partially shady location will be suitable, but the more sun the plant gets, the more flowers you will see! Water the plants well, especially the first few days, continuing to water until you see new growth. New growth will occur not only in plant height and leaves, but additional stems will emerge.
As the plants get established, they will need less and less attention. Water during droughts and in extreme temperatures, or if they begin to wilt. No fertilizer is needed. They are tolerant of flood, drought, and many soil types.
The plants die off in cooler months, and they can be cut to the ground to remove the unsightly remains. They will come back in the spring in warmer zones (Zone 8 and below) with additional, stronger stems.
SPRING BULBS
Spring Bulbs Include; ________
These bulbs need a cool period to break out of dormancy, so these need to be planted in the fall, after it begins to cool down.
Plant After First Frost
Planting Depth
Enjoy in the Spring
Our Expertise
Mexican Petunias (Rooted)
Mexican Petunias (Rooted)
GUIDANCE FOR FLOWER SEEDS
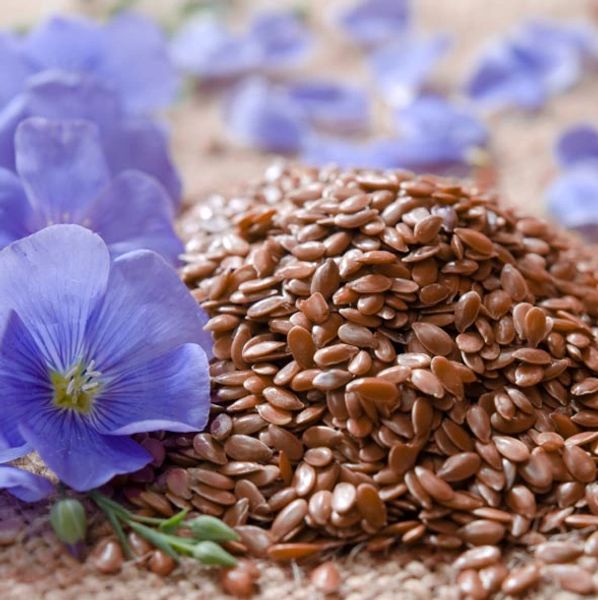
FLOWER SEED BASICS
Flower seeds all have unique directions for best germination. Details are below for various seeds from Laura's Lilies. Let's review some definitions.
Lifespan: Annual plants will grow for the season, and will not return. Some may self-sow, but the original plant has expired. Perennial plants s
GUIDANCE FOR FLOWER SEEDS
FLOWER SEED BASICS
Flower seeds all have unique directions for best germination. Details are below for various seeds from Laura's Lilies. Let's review some definitions.
Lifespan: Annual plants will grow for the season, and will not return. Some may self-sow, but the original plant has expired. Perennial plants should come back each year with proper care. They may also spread through underground roots or self-sowing.
Light: This describes the best location for the plants to thrive, as far as sunshine. Full sun is 6 or more hours of sun each day, partial sun is 3 to 6 hours of sun each day, and shade is less then 3 hours of sun each day.
Indoor Germinating Start: This is the recommended time to germinate the seeds indoors. Do this using peat pellets or other soil, planting at the recommended depth, and keeping moist with good light. This gives your plant a head start for the season. Harden off & plant outdoors after last frost date.
Germination Time: This is how long is normally takes for the seeds to germinate under good conditions. This generally means 70-80 degrees Fahrenheit. Cooler temperature usually slow down germination time.
Outdoor Seed Planting: This is the recommended time to plant the seeds if you are direct sowing them outdoors.
Depth: Plant the seeds at this depth for their best chance of germination and survival.
Spacing: This is the recommended spacing to give the plants adequate room to grow properly.
Succession Planting means staggering the plantings to extend the bloom/harvest season.
It is important to you know your last frost date, as many of the seed instructions are based off of that date. Check below if you are unsure of your date.
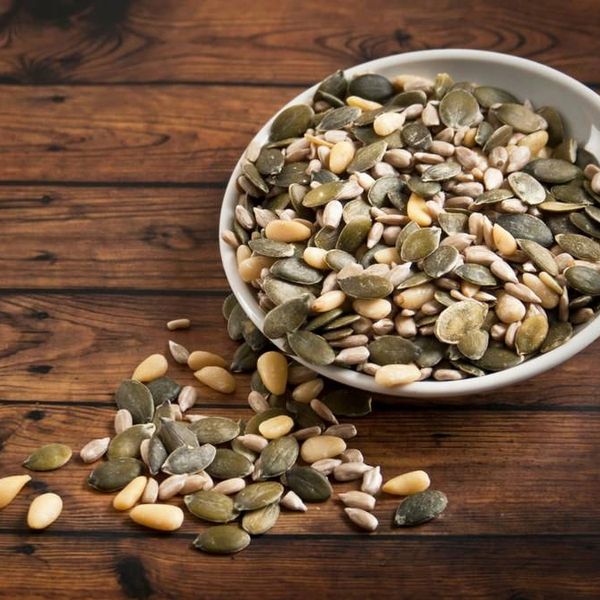
LAURA'S LILIES BLENDS
Lifespan:
Light:
Indoor Germinating Start:
Germination Time:
Outdoor Seed Planting:
Depth:
Spacing:
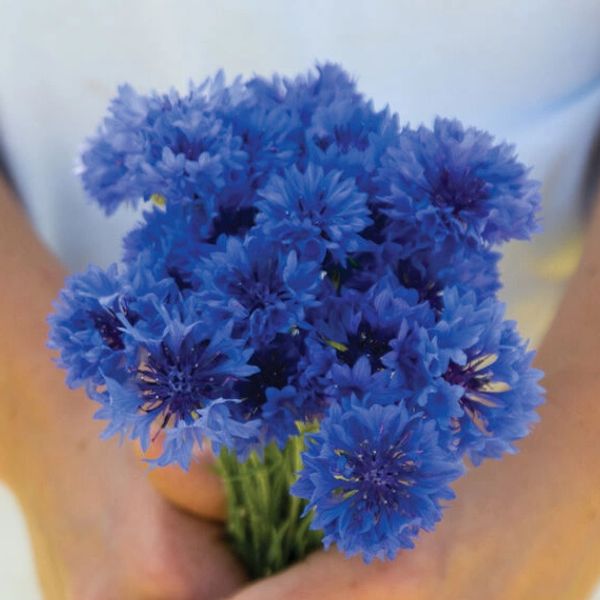
BACHELOR BUTTONS
Lifespan: Annual
Light: Full Sun
Indoor Germinating Start: 4-6 Weeks Before Last Frost Date
Germination Time: 7-14 Days
Outdoor Seed Planting: (Recommended) 1-2 Weeks Before Last Frost Date
Depth: 1/4 Inch
Spacing: 9 Inches
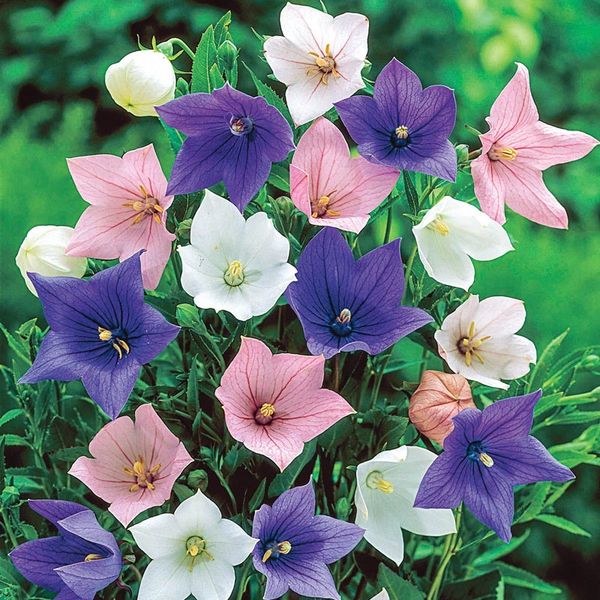
BALLOON FLOWERS
Lifespan: Perennial
Light: Full Sun to Partial Sun
Indoor Germinating Start: 6-8 Weeks Before Last Frost Date
Germination Time: 21-30 Days
Outdoor Seed Planting: After Last Frost Date
Depth: 0 Inches (Surface)
- This seed needs light to germinate
Spacing: 12 Inches
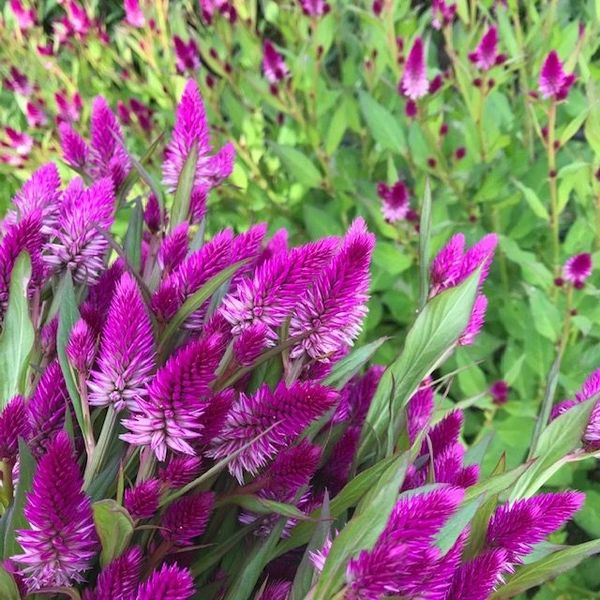
CELOSIA
Lifespan: Annual
Light: Full Sun
Indoor Germinating Start: (Recommended) 6-8 Weeks Before Last Frost Date
Germination Time: 8-14 Days
Outdoor Seed Planting: After Last Frost Date
Not Recommended with Short Growing Seasons
Depth: 1/8 Inch
Spacing: 8 Inches
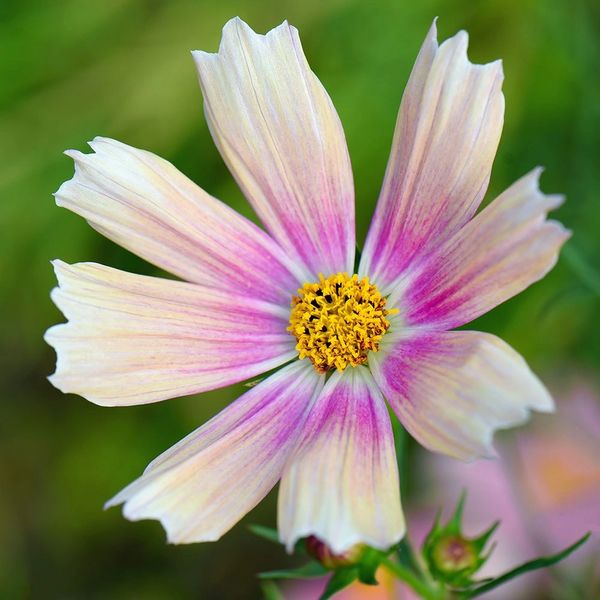
COSMOS
Lifespan:
Light:
Indoor Germinating Start: 5-7 Weeks Before Last Frost Date
Germination Time: 7-10 Days
Outdoor Seed Planting:
Depth:
Spacing:
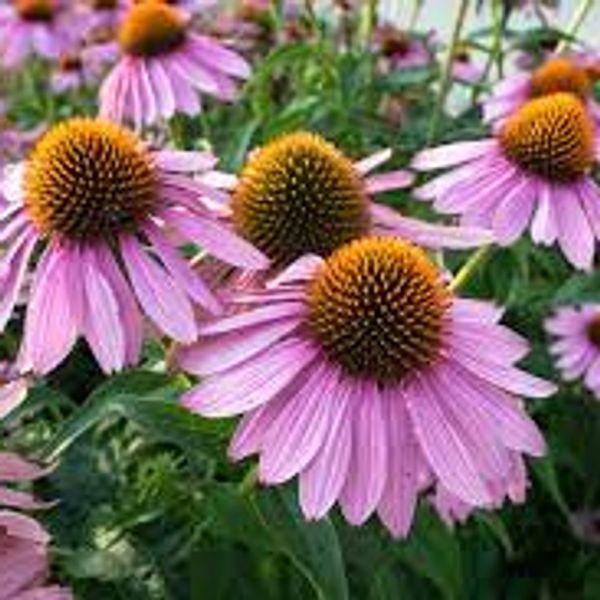
ECHINACEA (CONEFLOWER)
Lifespan:
Light:
Indoor Germinating Start:
Germination Time:
Outdoor Seed Planting:
Depth:
Spacing:
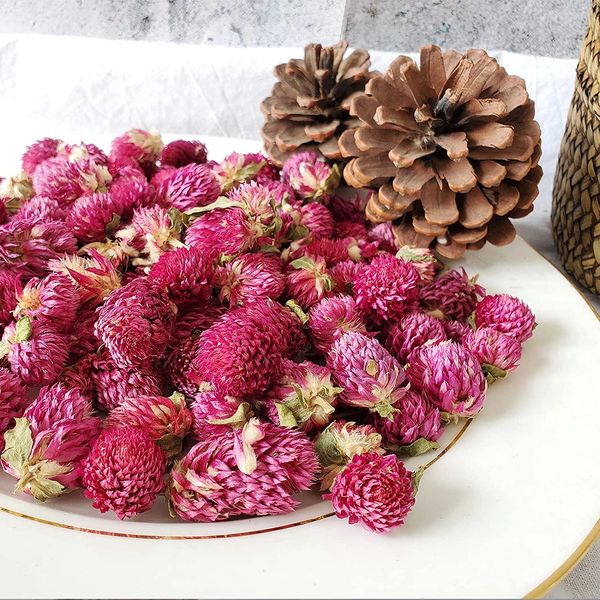
GOMPHRENA
Lifespan:
Light:
Indoor Germinating Start:
Germination Time:
Outdoor Seed Planting:
Depth:
Spacing:
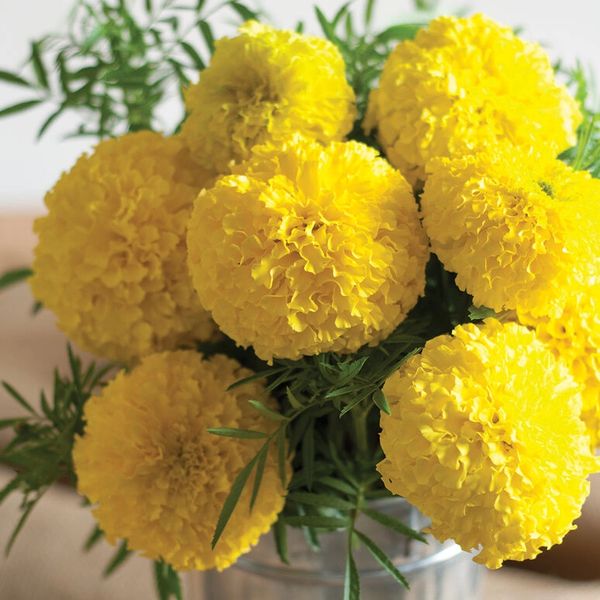
MARIGOLD
Lifespan:
Light:
Indoor Germinating Start:
Germination Time:
Outdoor Seed Planting:
Depth:
Spacing:
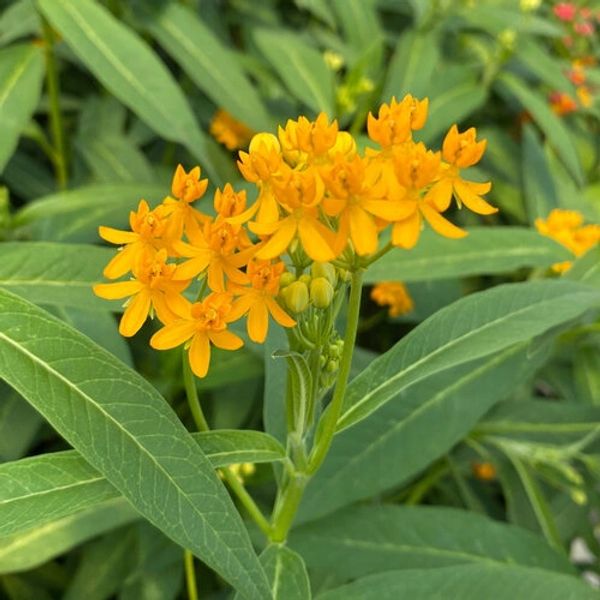
MILKWEED
Lifespan: Perennial
Light: Full Sun
Indoor Germinating Start: 4-8 Weeks Before Last Frost Date
Germination Time: 7-10 Days
Outdoor Seed Planting: Late Fall, After a Few Frosts
Depth: 1/4 Inch
Spacing: 18-24 Inches
Note: Milkweed Readily Self Sows and Floats with Dandelion-Like Fluff
To Control Invasion, Remove Seed Pods Prior to Maturing
Note: Milkweed Seeds Must be Cold Stratified Before Planting Indoors
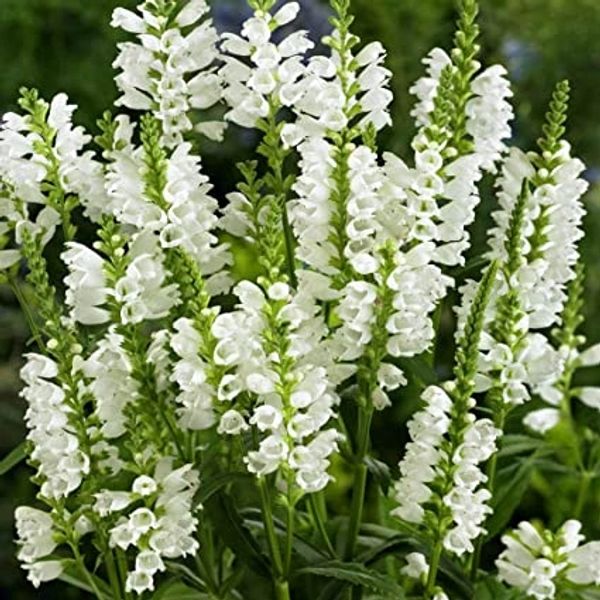
OBIDIENT PLANT
Lifespan: Perennial
Light: Full Sun to Partial Sun
Indoor Germinating Start: 6-8 Weeks Before Last Frost Date
Germination Time: 7-10 Days
Outdoor Seed Planting: Late Fall, After a Few Frosts
Depth: 1/4 Inch
Spacing: 18-24 Inches
Note: Keep Seeds in Refrigerator for 60 Days Prior to Planting Indoors to Simulate Winter Conditions
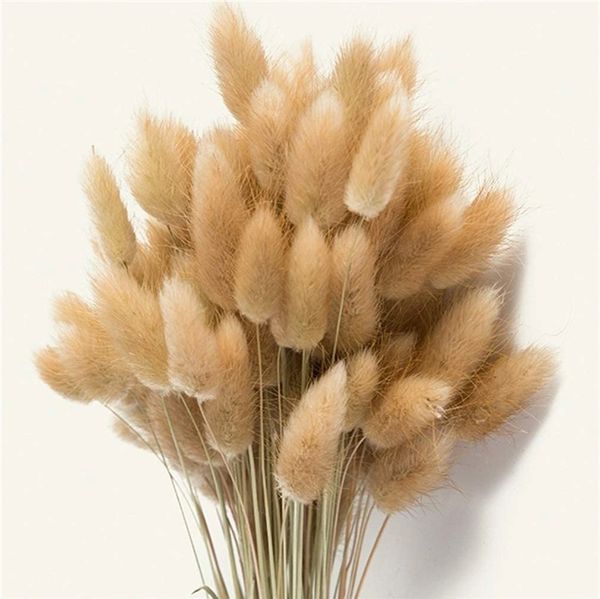
ORNAMENTAL GRASS - BUNNY TAILS
Lifespan: Annual
Light: Full Sun
Indoor Germinating Start: 5-7 Weeks Before Last Frost Date
Germination Time: 10-14 Days
Outdoor Seed Planting: After Last Frost Date
Not Recommended with Short Growing Seasons
Depth: 1/8 Inch
Spacing: 12 Inches
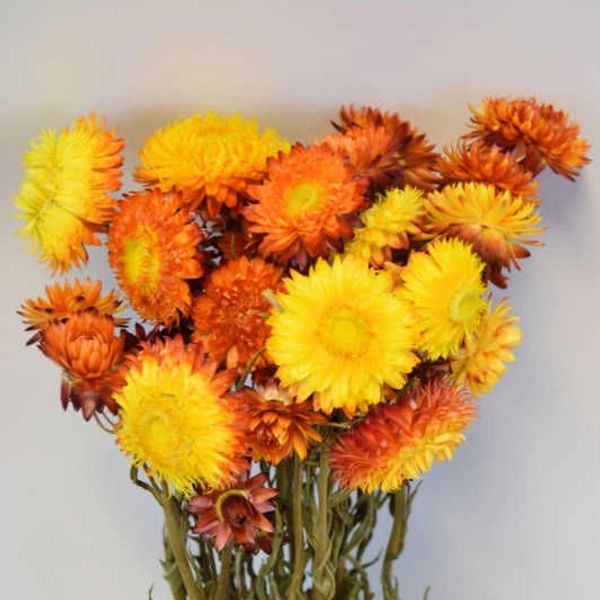
STRAWFLOWERS
Lifespan: Annual
Light: Full Sun
Indoor Germinating Start: 4-6 Weeks Before Last Frost Date
Germination Time: 7-10 Days
Outdoor Seed Planting: After Last Frost Date
Depth: 0 Inches (Surface)
- This seed needs light to germinate
Spacing: 12 Inches
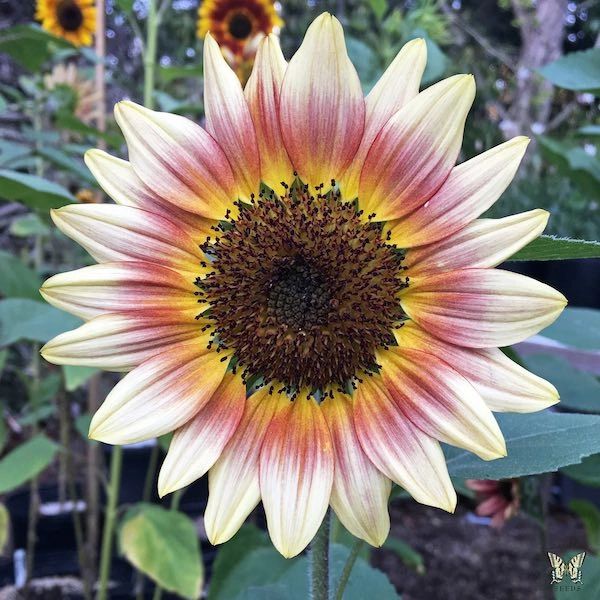
SUNFLOWERS
Lifespan: Annual
Light: Full Sun
Indoor Germinating Start: Not Recommended
Germination Time: 7-14 Days
Outdoor Seed Planting: After Last Frost Date
Depth: 1/2 Inch
Spacing: 6 Inches (Single Stem) & 18 Inches (Branching)
Note: Succession Planting Prolongs Blooming Season
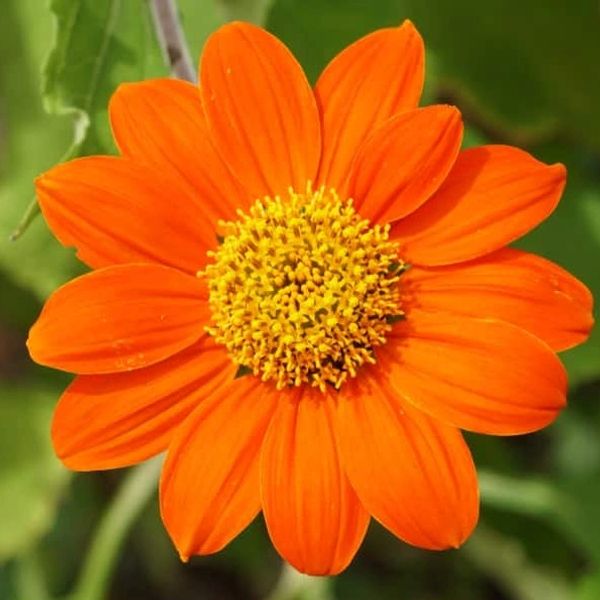
TITHONIA (MEXICAN SUNFLOWERS)
Lifespan: Annual
Light: Full Sun
Indoor Germinating Start: 6 Weeks Before Last Frost Date
Germination Time: 7-14 Days
Outdoor Seed Planting: (Recommended) After Last Frost Date
Depth: 0 Inches (Surface)
- This seed needs light to germinate
Spacing: 18 Inches
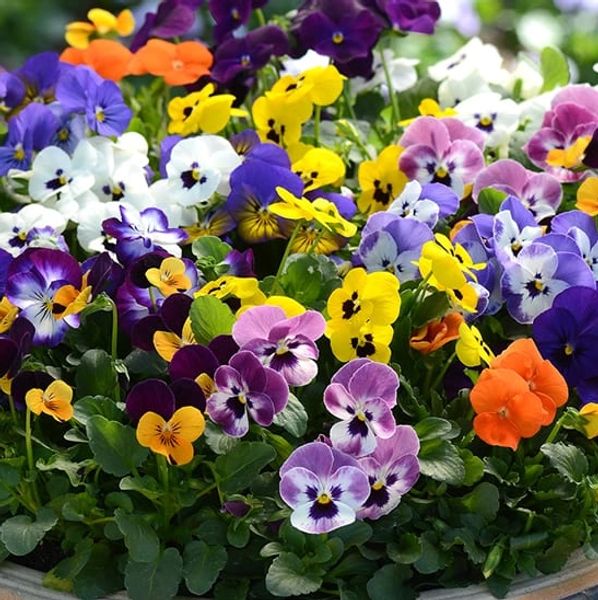
VIOLA
Lifespan: Annual - Self Sows Readily
Light: Sun to Partial Sun
Indoor Germinating Start: 8 Weeks Before Transplant Date
Germination Time: 4-7 Days
Outdoor Seed Planting: Not Recommended
Depth: 1/8 Inch
Spacing: 6 Inches
Note: Violas are Cool Temperature Flowers and Tolerate a Light Frost
They dislike the heat of the summers
Plant According to Desired Bloom Time (1-2 Weeks After Transplant)
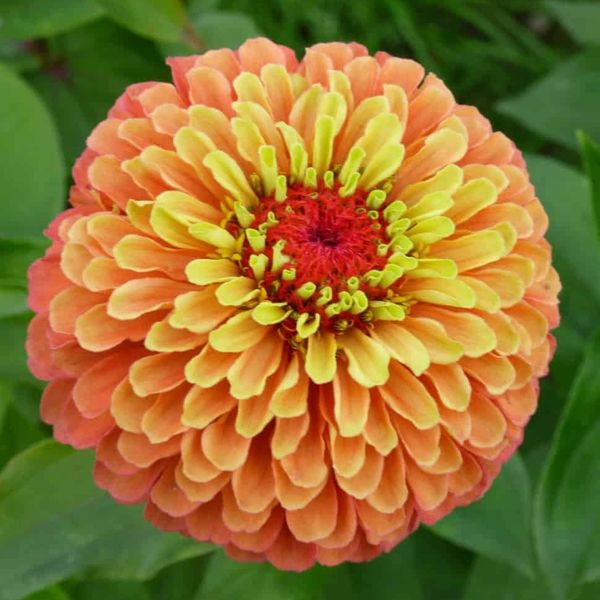
ZINNIA
Lifespan: Annual
Light: Full Sun
Indoor Germinating Start: 4 Weeks Before Last Frost
Germination Time: 3-7 Days
Outdoor Seed Planting: After Last Frost Date
Depth: 1/4 Inch
Spacing: 9-12 Inches
Note: Succession Planting Prolongs Blooming Season
Our Services
Mexican Petunias (Rooted)
Our Services
FLOWER SEEDS
Master seed germination with instructions on sprouting your flowers. This includes flowers, ornamental grasses, and our special Laura's Lilies seed blends.
Our Vision
Mexican Petunias (Rooted)
Our Services
WE APPRECIATE YOUR BUSINESS & SUPPORT
Laura's Lilies doesn't just sell products, we give you the tools to be successful with them.
Scroll down to learn more about your newest purchase.
GUIDANCE FOR FRESH CUT & DRIED FLOWERS
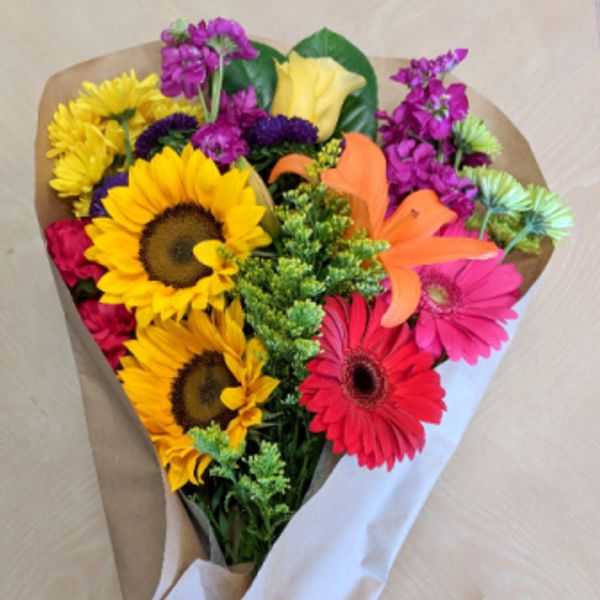
BRINGING BOUQUETS HOME
Many flowers can last a bit of time out of water, but you want to minimize it and hydrate them
WE APPRECIATE YOUR BUSINESS & SUPPORT
Laura's Lilies doesn't just sell products, we give you the tools to be successful with them.
Scroll down to learn more about your newest purchase.
GUIDANCE FOR FRESH CUT & DRIED FLOWERS
BRINGING BOUQUETS HOME
Many flowers can last a bit of time out of water, but you want to minimize it and hydrate them again as soon as possible. Flowers will suck water through their stems like a straw. After being out of water for a while, trim the end with sharp shears to open up the fresh veins which may have 'callused over' from drying out. You only need to cut a half inch to be effective. Also, make sure to cut at a 45 degree angle to maximize the surface area available to absorb water. Of course, place the stems in water immediately, and even cut under running water if possible. For most flowers , warm room temperature is best. Don't forget to cut off any remaining leaves below the water line, these will rot and create dirty water for your floral beauties, and can contribute to dehydration and shorter vase life.
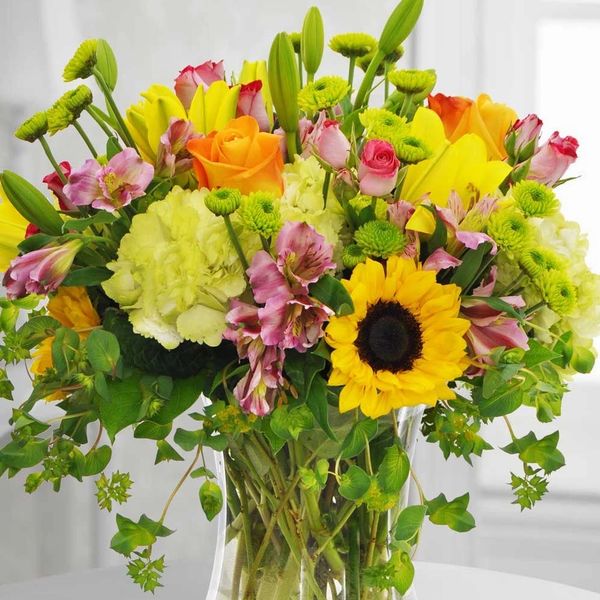
FLOWER ARRANGING
Arranging your flowers does have somewhat of an art to it, but first we need to prepare the 'canvas.' Before working with the stems, prepare your vase with room temperature water, and flower food. These usually come in small packets, but you can always try our own recipe. Mix according to the packet and use the right ratio of water.
After we have the vase prepared, we can being creating our arrangement. After being out of water for a while, trim the end with sharp shears to open up the fresh veins which may have 'callused over' from drying out. You only need to cut a half inch to be effective. Also, make sure to cut at a 45 degree angle to maximize the surface area available to absorb water. Of course, place the stems in water immediately, and even cut under running water if possible. Don't forget to cut off any remaining leaves below the water line, these will rot and create dirty water for your floral beauties.
The next step is to decide how you want to arrange your flowers. Do you want a vase which will be placed against the wall, or one with a 360 degree view? Keep this in mind as you place the stems. Here are a few florist theories to help you create your masterpiece;
- Balance & Spacing: Ensure to balance the flowers on each/all side(s) of your center point, and spread similar flowers (varieties or colors) out from each other.
- Proportion: Make sure your flower size and stem length goes well with the vase. This is also a recommendation for placing vases through a home/office/etc. Big spaces need big arrangements or they can get lost in the room.
- Pattern & Rule of 3: Use 3 (or an odd number) of each variety to create a full and balanced look. Spread the flowers out through the viewing plane.
- Thrillers, Spillers & Fillers: Use thrillers as your focal flowers, these are the bigger or brighter flowers. Use spillers to fill the bottom area of your arrangement space. Finalize with fillers to allow space between your thrillers.
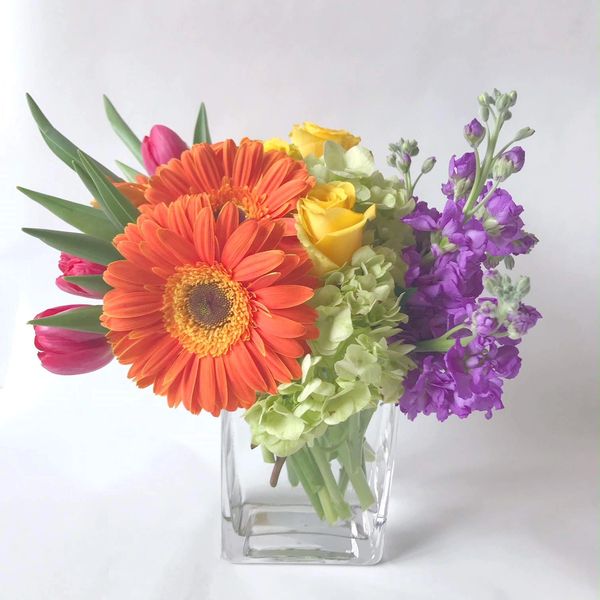
PRE-MADE ARRANGMENTS
These arrangements are easy, and already 'designed' for you. We suggest you bring them home and let them adjust to their new environment for a few hours. At some point, before heading to bed, mix up for your flower food and some fresh water for your stems.
Simply follow the tips for longer vase life below, and enjoy your flowers.
LONGER VASE LIFE
Fresh cut flowers, frequent water changes, and flower food are the basics of long vase life. Your flowers will likely last 3-5 days with no care, but with proper care could double and triple that, with a vase life of up to 2 weeks. Here are some other tips on maximizing your flowers;
- Keep them away from direct sunlight.
Flowers may like the sun when growing, but after harvesting, it is best to keep them shaded.
- Avoid drafts and breezes.
Air flow is great for preventing mold and bacteria in the field, but drafts and constant air flow after harvesting is hard on the stems.
- Maintain cool temperatures.
Most flowers will last longer in cooler environments once cut. You can even put them in the fridge at night or when at work to preserve them as long as possible. Just be careful to avoid the fridge for a few special flowers like zinnias, celosia and balloon flowers.
- Recut stems.
Even in water, stems may callus over. Recut them when you change the water and let them get a good drink. Cut just a bit off the bottom, a half inch should do, and cut at a 45 degree angle to maximize the surface area for water absorption. Remember to trim any leaves that may be below the water line to keep the water clean.
- Remove spent flowers.
Various flowers will not last as long as others once harvested. This is natural. When flowers fade, they are no longer beneficial to your arrangement, aesthetically or via cleanliness. Pull them out to keep things looking good and prevent any bacteria rot in the water which could affect the other flowers.
- Keep away from fruit.
Fruits often release a gas called ethylene which can cause flowers to age more rapidly. Keep your fruit and flowers in separate areas to maximize vase life.
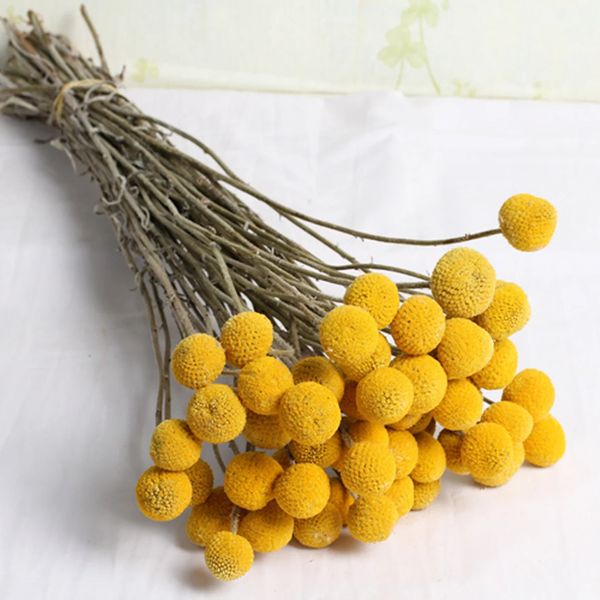
DRIED FLOWER PRESERVATION
Who knew hair products would be the best answer for preserving dried flowers? Here's how to use them;
Once you receive and arrange your dried flowers, hair spray is helpful to maintain color and increase durability. Use an aerosol version and spray lightly at several angles in small bursts. Avoid any dripping and let bursts dry between sprays as needed.
After some time, dried flowers may gather some dust. Grab a hairdryer and set on the coolest setting, with the lowest air flow. Blow the flowers at several angles moving constantly to shake off and remove dust.
Who We Are
Mexican Petunias (Rooted)
Mexican Petunias (Rooted)
Mexican Petunias (Rooted)
FRESH CUT AND DRIED FLOWERS
Learn how to maximize your farm fresh cut flowers & care for your dried flowers. This includes bouquets, arrangements, you-pick flowers, and all dried products.
Our Expertise
Mexican Petunias (Rooted)
Mexican Petunias (Rooted)
LIVE & DORMANT PLANTS
Review planting instructions for your new garden additions. This includes cuttings, bareroot plants, bulbs, corms, tubers, etc.
Our Services
Mexican Petunias (Rooted)
Our Services
FLOWER SEEDS
Master seed germination with instructions on sprouting your flowers. This includes flowers, ornamental grasses, and our special Laura's Lilies seed blends.
Our Vision
Mexican Petunias (Rooted)
Our Services
SPECIALTY AND PROMOTIONAL PRODUCTS
Check out details on the use and care of specialty and promotional items.
SPECIALTY & PROMOTIONAL PRODUCT USE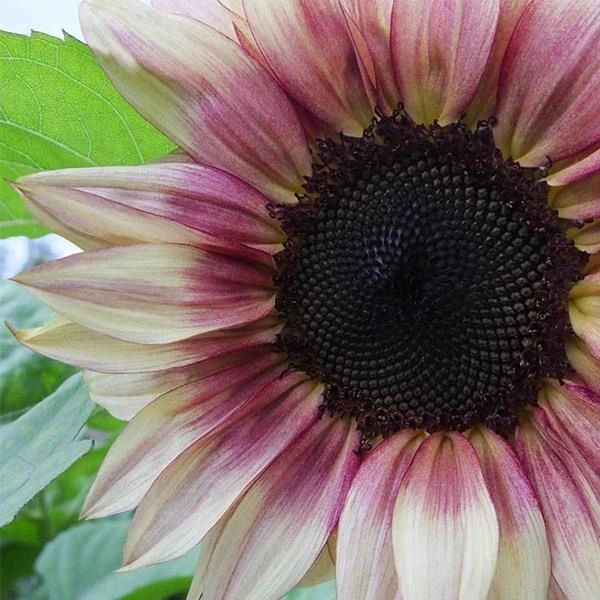
OTHER LAURA'S LILIES PRODUCTS
We haven't left these items out; here is the information on everything else!
Who We Are
Mexican Petunias (Rooted)
Mexican Petunias (Rooted)
Mexican Petunias (Rooted)
Mexican Petunias (purple, pink & white) are quite easy to grow, they just need a minute to get established.
Upon receiving your plants, remove them from the Ziploc bag right away. Place them in a cup of water, covering the roots and ensuring the leaves remain dry and out of the water.
After your last frost date, place the cuttings in the
Mexican Petunias (purple, pink & white) are quite easy to grow, they just need a minute to get established.
Upon receiving your plants, remove them from the Ziploc bag right away. Place them in a cup of water, covering the roots and ensuring the leaves remain dry and out of the water.
After your last frost date, place the cuttings in the ground. Dig a hole a few inches deep in a sunny location, and back fill with soil. Press the soil down lightly to ensure good contact and plant support. A partially shady location will be suitable, but the more sun the plant gets, the more flowers you will see! Water the plants well, especially the first few days, continuing to water daily until you see new growth. New growth will occur not only in plant height and leaves, but additional stems will emerge.
As the plants get established, they will need less and less attention. Water during droughts and in extreme temperatures, or if they begin to wilt. No fertilizer is needed. They are tolerant of flood, drought, and many soil types.
The plants die off in cooler months, and they can be cut to the ground to remove the unsightly remains. They will come back in the spring in warmer zones (Zone 8 and below) with additional, stronger stems.
Our Expertise
Mexican Petunias (Rooted)
Mexican Petunias (Rooted)
These garden markers are the last ones you will need to buy. We use them for all of our labeled plants. You can write on them with pencil, crayon, nursery marker, paint pen, or grease pen, but we recommend labels (Brother P-Touch Labels) for a long term solution. Simply label the plant in whichever way you choose, and stick the double po
These garden markers are the last ones you will need to buy. We use them for all of our labeled plants. You can write on them with pencil, crayon, nursery marker, paint pen, or grease pen, but we recommend labels (Brother P-Touch Labels) for a long term solution. Simply label the plant in whichever way you choose, and stick the double posts several inches in the ground to remember exactly what you put beneath that soil.
Our Services
Mexican Petunias (Rooted)
Our Services
EARRINGS
We don't have much direction on what to do with your earrings, but here is some general guidance on what not to do to keep your jewelry clean and shiny!
The S's to Avoid for Proper Jewelry Care
Showers / Soaps / Scrubs
Sprays
Soil / Sun / Sunscreen
Sweat / Swimming
Sleep
Sports
SUGAR SCRUBS
These sugar scrubs are a treat for rough hands!
W
EARRINGS
We don't have much direction on what to do with your earrings, but here is some general guidance on what not to do to keep your jewelry clean and shiny!
The S's to Avoid for Proper Jewelry Care
Showers / Soaps / Scrubs
Sprays
Soil / Sun / Sunscreen
Sweat / Swimming
Sleep
Sports
SUGAR SCRUBS
These sugar scrubs are a treat for rough hands!
We recommend you wet your hands a bit to help spread the scrub around. Then, with your fingers, scoop a small amount out of your jar. Massage around your hands and fingers, even up to your wrists. Try them on your feet too! We do not recommend using these on your face or lips as the exfoliating properties are quite strong. When complete, just rinse off and you will be left with sweet smelling, smooth hands, or feet!
Our Vision
Mexican Petunias (Rooted)
Our Services
Our vision at Fire Tower Flowers is to be the most reliable and trusted flower delivery service provider in the industry. We strive to provide a seamless and enjoyable experience to our customers by offering exceptional quality, creativity, and customer service. We believe in spreading happiness and joy through our beautiful floral arrangements.
Who We Are
Mexican Petunias (Rooted)
Mexican Petunias (Rooted)
Mexican Petunias (Rooted)
FRESH CUT AND DRIED FLOWERS
Learn how to maximize your farm fresh cut flowers & care for your dried flowers. This includes bouquets, arrangements, you-pick flowers, and all dried products.
Our Expertise
Mexican Petunias (Rooted)
Mexican Petunias (Rooted)
LIVE & DORMANT PLANTS
Review planting instructions for your new garden additions. This includes cuttings, bareroot plants, bulbs, corms, tubers, etc.
Our Services
Mexican Petunias (Rooted)
Our Services
FLOWER SEEDS
Master seed germination with instructions on sprouting your flowers. This includes flowers, ornamental grasses, and our special Laura's Lilies seed blends.
Our Vision
Mexican Petunias (Rooted)
Our Services
SPECIALTY AND PROMOTIONAL PRODUCTS
Check out details on the use and care of specialty and promotional items.
SPECIALTY & PROMOTIONAL PRODUCT USE
OTHER LAURA'S LILIES PRODUCTS
We haven't left these items out; here is the information on everything else!
Who We Are
Mexican Petunias (Rooted)
Mexican Petunias (Rooted)
Mexican Petunias (Rooted)
MEXICAN PETUNIA CUTTINGS
Mexican Petunias (purple, pink & white) are quite easy to grow, they just need a minute to get established.
Upon receiving your plants, remove them from the Ziploc bag right away. Place them in a cup of water, covering only the roots and ensuring the leaves remain dry and out of the water.
After your last frost da
MEXICAN PETUNIA CUTTINGS
Mexican Petunias (purple, pink & white) are quite easy to grow, they just need a minute to get established.
Upon receiving your plants, remove them from the Ziploc bag right away. Place them in a cup of water, covering only the roots and ensuring the leaves remain dry and out of the water.
After your last frost date, place the cuttings in the ground. Dig a hole a few inches deep in a sunny location, and back fill with soil. Press the soil down lightly to ensure good contact and plant support. A partially shady location will be suitable, but the more sun the plant gets, the more flowers you will see! Water the plants well, especially the first few days, continuing to water until you see new growth. New growth will occur not only in plant height and leaves, but additional stems will emerge.
As the plants get established, they will need less and less attention. Water during droughts and in extreme temperatures, or if they begin to wilt. No fertilizer is needed. They are tolerant of flood, drought, and many soil types.
The plants die off in cooler months, and they can be cut to the ground to remove the unsightly remains. They will come back in the spring in warmer zones (Zone 8 and below) with additional, stronger stems.
SPRING BULBS
Spring Bulbs Include; ________
These bulbs need a cool period to break out of dormancy, so these need to be planted in the fall, after it begins to cool down.
Plant After First Frost
Planting Depth
Enjoy in the Spring
Our Expertise
Mexican Petunias (Rooted)
Mexican Petunias (Rooted)
GUIDANCE FOR FLOWER SEEDS
FLOWER SEED BASICS
Flower seeds all have unique directions for best germination. Details are below for various seeds from Laura's Lilies. Let's review some definitions.
Lifespan: Annual plants will grow for the season, and will not return. Some may self-sow, but the original plant has expired. Perennial plants s
GUIDANCE FOR FLOWER SEEDS
FLOWER SEED BASICS
Flower seeds all have unique directions for best germination. Details are below for various seeds from Laura's Lilies. Let's review some definitions.
Lifespan: Annual plants will grow for the season, and will not return. Some may self-sow, but the original plant has expired. Perennial plants should come back each year with proper care. They may also spread through underground roots or self-sowing.
Light: This describes the best location for the plants to thrive, as far as sunshine. Full sun is 6 or more hours of sun each day, partial sun is 3 to 6 hours of sun each day, and shade is less then 3 hours of sun each day.
Indoor Germinating Start: This is the recommended time to germinate the seeds indoors. Do this using peat pellets or other soil, planting at the recommended depth, and keeping moist with good light. This gives your plant a head start for the season. Harden off & plant outdoors after last frost date.
Germination Time: This is how long is normally takes for the seeds to germinate under good conditions. This generally means 70-80 degrees Fahrenheit. Cooler temperature usually slow down germination time.
Outdoor Seed Planting: This is the recommended time to plant the seeds if you are direct sowing them outdoors.
Depth: Plant the seeds at this depth for their best chance of germination and survival.
Spacing: This is the recommended spacing to give the plants adequate room to grow properly.
Succession Planting means staggering the plantings to extend the bloom/harvest season.
It is important to you know your last frost date, as many of the seed instructions are based off of that date. Check below if you are unsure of your date.
LAURA'S LILIES BLENDS
Lifespan:
Light:
Indoor Germinating Start:
Germination Time:
Outdoor Seed Planting:
Depth:
Spacing:
BACHELOR BUTTONS
Lifespan: Annual
Light: Full Sun
Indoor Germinating Start: 4-6 Weeks Before Last Frost Date
Germination Time: 7-14 Days
Outdoor Seed Planting: (Recommended) 1-2 Weeks Before Last Frost Date
Depth: 1/4 Inch
Spacing: 9 Inches
BALLOON FLOWERS
Lifespan: Perennial
Light: Full Sun to Partial Sun
Indoor Germinating Start: 6-8 Weeks Before Last Frost Date
Germination Time: 21-30 Days
Outdoor Seed Planting: After Last Frost Date
Depth: 0 Inches (Surface)
- This seed needs light to germinate
Spacing: 12 Inches
CELOSIA
Lifespan: Annual
Light: Full Sun
Indoor Germinating Start: (Recommended) 6-8 Weeks Before Last Frost Date
Germination Time: 8-14 Days
Outdoor Seed Planting: After Last Frost Date
Not Recommended with Short Growing Seasons
Depth: 1/8 Inch
Spacing: 8 Inches
COSMOS
Lifespan:
Light:
Indoor Germinating Start: 5-7 Weeks Before Last Frost Date
Germination Time: 7-10 Days
Outdoor Seed Planting:
Depth:
Spacing:
ECHINACEA (CONEFLOWER)
Lifespan:
Light:
Indoor Germinating Start:
Germination Time:
Outdoor Seed Planting:
Depth:
Spacing:
GOMPHRENA
Lifespan:
Light:
Indoor Germinating Start:
Germination Time:
Outdoor Seed Planting:
Depth:
Spacing:
MARIGOLD
Lifespan:
Light:
Indoor Germinating Start:
Germination Time:
Outdoor Seed Planting:
Depth:
Spacing:
MILKWEED
Lifespan: Perennial
Light: Full Sun
Indoor Germinating Start: 4-8 Weeks Before Last Frost Date
Germination Time: 7-10 Days
Outdoor Seed Planting: Late Fall, After a Few Frosts
Depth: 1/4 Inch
Spacing: 18-24 Inches
Note: Milkweed Readily Self Sows and Floats with Dandelion-Like Fluff
To Control Invasion, Remove Seed Pods Prior to Maturing
Note: Milkweed Seeds Must be Cold Stratified Before Planting Indoors
OBIDIENT PLANT
Lifespan: Perennial
Light: Full Sun to Partial Sun
Indoor Germinating Start: 6-8 Weeks Before Last Frost Date
Germination Time: 7-10 Days
Outdoor Seed Planting: Late Fall, After a Few Frosts
Depth: 1/4 Inch
Spacing: 18-24 Inches
Note: Keep Seeds in Refrigerator for 60 Days Prior to Planting Indoors to Simulate Winter Conditions
ORNAMENTAL GRASS - BUNNY TAILS
Lifespan: Annual
Light: Full Sun
Indoor Germinating Start: 5-7 Weeks Before Last Frost Date
Germination Time: 10-14 Days
Outdoor Seed Planting: After Last Frost Date
Not Recommended with Short Growing Seasons
Depth: 1/8 Inch
Spacing: 12 Inches
STRAWFLOWERS
Lifespan: Annual
Light: Full Sun
Indoor Germinating Start: 4-6 Weeks Before Last Frost Date
Germination Time: 7-10 Days
Outdoor Seed Planting: After Last Frost Date
Depth: 0 Inches (Surface)
- This seed needs light to germinate
Spacing: 12 Inches
SUNFLOWERS
Lifespan: Annual
Light: Full Sun
Indoor Germinating Start: Not Recommended
Germination Time: 7-14 Days
Outdoor Seed Planting: After Last Frost Date
Depth: 1/2 Inch
Spacing: 6 Inches (Single Stem) & 18 Inches (Branching)
Note: Succession Planting Prolongs Blooming Season
TITHONIA (MEXICAN SUNFLOWERS)
Lifespan: Annual
Light: Full Sun
Indoor Germinating Start: 6 Weeks Before Last Frost Date
Germination Time: 7-14 Days
Outdoor Seed Planting: (Recommended) After Last Frost Date
Depth: 0 Inches (Surface)
- This seed needs light to germinate
Spacing: 18 Inches
VIOLA
Lifespan: Annual - Self Sows Readily
Light: Sun to Partial Sun
Indoor Germinating Start: 8 Weeks Before Transplant Date
Germination Time: 4-7 Days
Outdoor Seed Planting: Not Recommended
Depth: 1/8 Inch
Spacing: 6 Inches
Note: Violas are Cool Temperature Flowers and Tolerate a Light Frost
They dislike the heat of the summers
Plant According to Desired Bloom Time (1-2 Weeks After Transplant)
ZINNIA
Lifespan: Annual
Light: Full Sun
Indoor Germinating Start: 4 Weeks Before Last Frost
Germination Time: 3-7 Days
Outdoor Seed Planting: After Last Frost Date
Depth: 1/4 Inch
Spacing: 9-12 Inches
Note: Succession Planting Prolongs Blooming Season
Our Services
Mexican Petunias (Rooted)
Our Services
FLOWER SEEDS
Master seed germination with instructions on sprouting your flowers. This includes flowers, ornamental grasses, and our special Laura's Lilies seed blends.
Our Vision
Mexican Petunias (Rooted)
Our Services
WE APPRECIATE YOUR BUSINESS & SUPPORT
Laura's Lilies doesn't just sell products, we give you the tools to be successful with them.
Scroll down to learn more about your newest purchase.
GUIDANCE FOR FRESH CUT & DRIED FLOWERS
BRINGING BOUQUETS HOME
Many flowers can last a bit of time out of water, but you want to minimize it and hydrate them
WE APPRECIATE YOUR BUSINESS & SUPPORT
Laura's Lilies doesn't just sell products, we give you the tools to be successful with them.
Scroll down to learn more about your newest purchase.
GUIDANCE FOR FRESH CUT & DRIED FLOWERS
BRINGING BOUQUETS HOME
Many flowers can last a bit of time out of water, but you want to minimize it and hydrate them again as soon as possible. Flowers will suck water through their stems like a straw. After being out of water for a while, trim the end with sharp shears to open up the fresh veins which may have 'callused over' from drying out. You only need to cut a half inch to be effective. Also, make sure to cut at a 45 degree angle to maximize the surface area available to absorb water. Of course, place the stems in water immediately, and even cut under running water if possible. For most flowers , warm room temperature is best. Don't forget to cut off any remaining leaves below the water line, these will rot and create dirty water for your floral beauties, and can contribute to dehydration and shorter vase life.
FLOWER ARRANGING
Arranging your flowers does have somewhat of an art to it, but first we need to prepare the 'canvas.' Before working with the stems, prepare your vase with room temperature water, and flower food. These usually come in small packets, but you can always try our own recipe. Mix according to the packet and use the right ratio of water.
After we have the vase prepared, we can being creating our arrangement. After being out of water for a while, trim the end with sharp shears to open up the fresh veins which may have 'callused over' from drying out. You only need to cut a half inch to be effective. Also, make sure to cut at a 45 degree angle to maximize the surface area available to absorb water. Of course, place the stems in water immediately, and even cut under running water if possible. Don't forget to cut off any remaining leaves below the water line, these will rot and create dirty water for your floral beauties.
The next step is to decide how you want to arrange your flowers. Do you want a vase which will be placed against the wall, or one with a 360 degree view? Keep this in mind as you place the stems. Here are a few florist theories to help you create your masterpiece;
- Balance & Spacing: Ensure to balance the flowers on each/all side(s) of your center point, and spread similar flowers (varieties or colors) out from each other.
- Proportion: Make sure your flower size and stem length goes well with the vase. This is also a recommendation for placing vases through a home/office/etc. Big spaces need big arrangements or they can get lost in the room.
- Pattern & Rule of 3: Use 3 (or an odd number) of each variety to create a full and balanced look. Spread the flowers out through the viewing plane.
- Thrillers, Spillers & Fillers: Use thrillers as your focal flowers, these are the bigger or brighter flowers. Use spillers to fill the bottom area of your arrangement space. Finalize with fillers to allow space between your thrillers.
PRE-MADE ARRANGMENTS
These arrangements are easy, and already 'designed' for you. We suggest you bring them home and let them adjust to their new environment for a few hours. At some point, before heading to bed, mix up for your flower food and some fresh water for your stems.
Simply follow the tips for longer vase life below, and enjoy your flowers.
LONGER VASE LIFE
Fresh cut flowers, frequent water changes, and flower food are the basics of long vase life. Your flowers will likely last 3-5 days with no care, but with proper care could double and triple that, with a vase life of up to 2 weeks. Here are some other tips on maximizing your flowers;
- Keep them away from direct sunlight.
Flowers may like the sun when growing, but after harvesting, it is best to keep them shaded.
- Avoid drafts and breezes.
Air flow is great for preventing mold and bacteria in the field, but drafts and constant air flow after harvesting is hard on the stems.
- Maintain cool temperatures.
Most flowers will last longer in cooler environments once cut. You can even put them in the fridge at night or when at work to preserve them as long as possible. Just be careful to avoid the fridge for a few special flowers like zinnias, celosia and balloon flowers.
- Recut stems.
Even in water, stems may callus over. Recut them when you change the water and let them get a good drink. Cut just a bit off the bottom, a half inch should do, and cut at a 45 degree angle to maximize the surface area for water absorption. Remember to trim any leaves that may be below the water line to keep the water clean.
- Remove spent flowers.
Various flowers will not last as long as others once harvested. This is natural. When flowers fade, they are no longer beneficial to your arrangement, aesthetically or via cleanliness. Pull them out to keep things looking good and prevent any bacteria rot in the water which could affect the other flowers.
- Keep away from fruit.
Fruits often release a gas called ethylene which can cause flowers to age more rapidly. Keep your fruit and flowers in separate areas to maximize vase life.
DRIED FLOWER PRESERVATION
Who knew hair products would be the best answer for preserving dried flowers? Here's how to use them;
Once you receive and arrange your dried flowers, hair spray is helpful to maintain color and increase durability. Use an aerosol version and spray lightly at several angles in small bursts. Avoid any dripping and let bursts dry between sprays as needed.
After some time, dried flowers may gather some dust. Grab a hairdryer and set on the coolest setting, with the lowest air flow. Blow the flowers at several angles moving constantly to shake off and remove dust.
LIVE BAREROOT PLANTS & CUTTINGS
Agapanthus
Daisies (Montauk)
Agapanthus
Plant Type: Bareroot Rhizomes
Lifespan: Perennial, Zones 8-11
Light: Full Sun, Light Shade in Warm Climates
Depth: Place Crown Just Below Surface
Spacing: 18 Inches
Instructions: Soak your agapanthus roots for a few hours, then plant (indoors if still cool, outdoors is warm.) Water well until established.
Cacti
Daisies (Montauk)
Agapanthus
Plant Type: Non-Rooted Cutting
Lifespan:
Canna Lilies
Daisies (Montauk)
Daisies (Montauk)
Plant Type: Bareroot Rhizome
Lifespan: Perennial, Zones 8-10
Light: Full Sun
Depth:
Daisies (Montauk)
Daisies (Montauk)
Daisies (Montauk)
Plant Type: Cutting
Daylilies
Purple Queen/Heart
Daylilies
Plant Type: Bareroot Rhizome
Lifespan: Perennial, Zones 8-10
Light: Full Sun
Depth:
Hostas
Purple Queen/Heart
Daylilies
Plant Type: Bareroot Rhizome
Lifespan: Perennial, Zones 8-10
Light: Full Sun
Depth:
Mexican Petunias
Purple Queen/Heart
Purple Queen/Heart
Mexican Petunias (purple, pink & white) are quite easy to grow, they just need a minute to get established. Upon receiving your plants, remove them from the Ziploc bag right away. Place them in a cup of water, covering only the roots and ensuring the leaves remain dry and out of the water. After your last frost date, place the cuttings i
Mexican Petunias (purple, pink & white) are quite easy to grow, they just need a minute to get established. Upon receiving your plants, remove them from the Ziploc bag right away. Place them in a cup of water, covering only the roots and ensuring the leaves remain dry and out of the water. After your last frost date, place the cuttings in the ground. Dig a hole a few inches deep in a sunny location, and back fill with soil. Press the soil down lightly to ensure good contact and plant support. A partially shady location will be suitable, but the more sun the plant gets, the more flowers you will see! Water the plants well, especially the first few days, continuing to water until you see new growth. New growth will occur not only in plant height and leaves, but additional stems will emerge.As the plants get established, they will need less and less attention. Water during droughts and in extreme temperatures, or if they begin to wilt. No fertilizer is needed. They are tolerant of flood, drought, and many soil types.The plants die off in cooler months, and they can be cut to the ground to remove the unsightly remains. They will come back in the spring in warmer zones (Zone 8 and below) with additional, stronger stems.
Purple Queen/Heart
Purple Queen/Heart
Purple Queen/Heart
Mexican Petunias (purple, pink & white) are quite easy to grow, they just need a minute to get established. Upon receiving your plants, remove them from the Ziploc bag right away. Place them in a cup of water, covering only the roots and ensuring the leaves remain dry and out of the water. After your last frost date, place the cuttings i
Mexican Petunias (purple, pink & white) are quite easy to grow, they just need a minute to get established. Upon receiving your plants, remove them from the Ziploc bag right away. Place them in a cup of water, covering only the roots and ensuring the leaves remain dry and out of the water. After your last frost date, place the cuttings in the ground. Dig a hole a few inches deep in a sunny location, and back fill with soil. Press the soil down lightly to ensure good contact and plant support. A partially shady location will be suitable, but the more sun the plant gets, the more flowers you will see! Water the plants well, especially the first few days, continuing to water until you see new growth. New growth will occur not only in plant height and leaves, but additional stems will emerge.As the plants get established, they will need less and less attention. Water during droughts and in extreme temperatures, or if they begin to wilt. No fertilizer is needed. They are tolerant of flood, drought, and many soil types.The plants die off in cooler months, and they can be cut to the ground to remove the unsightly remains. They will come back in the spring in warmer zones (Zone 8 and below) with additional, stronger stems.
Spiderworts
Spiderworts
Spiderworts
Mexican Petunias (purple, pink & white) are quite easy to grow, they just need a minute to get established. Upon receiving your plants, remove them from the Ziploc bag right away. Place them in a cup of water, covering only the roots and ensuring the leaves remain dry and out of the water. After your last frost date, place the cuttings i
Mexican Petunias (purple, pink & white) are quite easy to grow, they just need a minute to get established. Upon receiving your plants, remove them from the Ziploc bag right away. Place them in a cup of water, covering only the roots and ensuring the leaves remain dry and out of the water. After your last frost date, place the cuttings in the ground. Dig a hole a few inches deep in a sunny location, and back fill with soil. Press the soil down lightly to ensure good contact and plant support. A partially shady location will be suitable, but the more sun the plant gets, the more flowers you will see! Water the plants well, especially the first few days, continuing to water until you see new growth. New growth will occur not only in plant height and leaves, but additional stems will emerge.As the plants get established, they will need less and less attention. Water during droughts and in extreme temperatures, or if they begin to wilt. No fertilizer is needed. They are tolerant of flood, drought, and many soil types.The plants die off in cooler months, and they can be cut to the ground to remove the unsightly remains. They will come back in the spring in warmer zones (Zone 8 and below) with additional, stronger stems.
POTTED PLANTS
Clematis
Clematis
Clematis
Lifespan: Perennial, Zones 4-9
Light: Full Sun, Light Shade Acceptable
Soil: Well Draining
Directions: Dig a hole slightly larger than the plant pot. Remove plant, loosen roots and place in hole, aligning the top of the roots (crown) just below the surface. Back fill with good quality compost soil and ensure to compact soil to ensure good ro
Lifespan: Perennial, Zones 4-9
Light: Full Sun, Light Shade Acceptable
Soil: Well Draining
Directions: Dig a hole slightly larger than the plant pot. Remove plant, loosen roots and place in hole, aligning the top of the roots (crown) just below the surface. Back fill with good quality compost soil and ensure to compact soil to ensure good root-soil contact. Water well until established, as seen by new growth.
Learn more about pruning reccomendations in our Signature Flower Library.
Roses
Clematis
Clematis
Lifespan: Perennial, Zones 5-9
Light: Full Sun, Light Shade Acceptable
Soil: Well Draining
Directions: Dig a hole slightly larger than the plant pot. Remove plant, loosen roots and place in hole, aligning the top of the roots (crown) just below the surface. Back fill with good quality compost soil and ensure to compact soil to ensure good ro
Lifespan: Perennial, Zones 5-9
Light: Full Sun, Light Shade Acceptable
Soil: Well Draining
Directions: Dig a hole slightly larger than the plant pot. Remove plant, loosen roots and place in hole, aligning the top of the roots (crown) just below the surface. Back fill with good quality compost soil and ensure to compact soil to ensure good root-soil contact. Water well until established, as seen by new growth.
Learn more about care recommendations in our Signature Flower Library.
DORMANT BULBS, CORMS & TUBERS
Crocosmia
Crocosmia
Crocosmia
Plant Type: Bulb
Lifespan: Perennial, Zone 6-9
Light: Full Sun
Depth: 4 Inches
Spacing: 6-8 Inches
Planting Season: Spring
Lilies
Crocosmia
Crocosmia
Plant Type: Bulbs
Lifespan: Perennial, Zones 3-9
Light: Full Sun
Depth: 8 Inches
Spacing: 8 Inches
Planting Season: Spring or Fall
The Basics
Know Your Zone
Direct Sow / Indoor Start
Determine Frost Dates
A planting zone, or hardiness zone, helps us determine which plants will thrive in our areas. The maps are based off of historical temperatures and are periodically updated. Determine your zone with the United States Department of Agriculture map.
Determine Frost Dates
Direct Sow / Indoor Start
Determine Frost Dates
Frost dates help us to time our plantings and seedlings. The last frost date is the last day in spring that temperatures which are damaging to plants are predicted. The first frost date is the first day in fall that the damaging temperatures are predicted. Determine your frost dates from the Old Farmer's Almanac.
Direct Sow / Indoor Start
Direct Sow / Indoor Start
Direct Sow / Indoor Start
Direct sowing flowers means planting the seeds in the ground, or container, rather than starting them in a controlled indoor environment to transplant later. Some seeds take very well to this, while others struggle and are best started indoors. You can use soil blocks, peat pellets, or any gardening pots with drainage. Never grow plants
Direct sowing flowers means planting the seeds in the ground, or container, rather than starting them in a controlled indoor environment to transplant later. Some seeds take very well to this, while others struggle and are best started indoors. You can use soil blocks, peat pellets, or any gardening pots with drainage. Never grow plants in pots without drainage. Place them in bright places and watch the seedlings sprout.
Annual / Perennial
Direct Sow / Indoor Start
Direct Sow / Indoor Start
Annual plants are plants which will grow within a growing season, but will not come back for another season. Perennial plants will return year after year with proper care. There are some annual plants which appear to be perennial, as they reseed themselves easily.
Stratification
Sucsession Planting
Stratification
Stratification is the process where we mimic the cool winter weather to break the dormancy of seeds. Some seeds will not germinate without this. To stratify seeds, place the seeds on a damp paper towel, or mix with moist material like sawdust or sand. Seal in a plastic bag or storage container. Place in the fridge for the prescribed period, then plant as directed.
Fall Sow
Sucsession Planting
Stratification
Seeds which require stratification can still be planted outdoors, we simply plant them in the fall. Nature produces its own stratification period and seeds sprout in the spring when the temperature warms.
Germination Tricks
Sucsession Planting
Sucsession Planting
Seeds can be finicky, so sometimes they need a bit of help. Indoors, try a heat mat or closely placed lights to help the seeds realize its time to wake up. Some tough seeds do well when they are soaked in water before planting, to soften the shell. Larger seeds can be carefully clipped to allow the seedling to break through the shell easier.
Sucsession Planting
Sucsession Planting
Sucsession Planting
Succession planting means planting a series of seeds at different times. Some annual plants don't quite make it through the summer, so planting another batch a little later will help keep your garden colorful until frost.
Seeds
Milkweed
Sunflowers
Sunflowers
There are different procedures which work best with different milkweed varieties. Check out the milkweed page for specific information on growing this special plant.
Sunflowers
Sunflowers
Sunflowers
Lifespan: Annual, Zones 2-11
Light: Full Sun
Direct Sow: Recommended After Last Frost Date
Indoor Start: Not Recommended
Germination Time: 7-14 Days
Depth: 1/2 Inch
Spacing: 6 Inches (Single Stem) & 18 Inches (Branching)
Note: Succession Planting Prolongs Blooming Season
Zinnias
Sunflowers
Zinnias
Lifespan: Annual, Zones 2-11
Light: Full Sun
Direct Sow: Recommended After Last Frost Date
Indoor Start: 4 Weeks Before Last Frost Date
Germination Time: 3-7 Days
Depth: 1/4 Inch
Spacing: 9-12 Inches
Note: Succession Planting Prolongs Blooming Season
About Fire Tower Flowers

Our Story
BUCKET IDEAS
GIFTS
Thank You Gifts
Holiday & Birthday Gifts
EVENT HOSTING
Baby Shower
Gender Reveal
Engagement Party
Wedding Shower
Bridal Shower
CIVIC ACTIVITIES
Arrangements for Nursing Homes
Girl Scout Activity
CRAFTS
Dried Flowers
Pressed Flowers
Decorated Resin Creations
corsage, boutineer, barette,
Our Mission
DYED FRESH FLOWERS
White and light colored flowers can be dyed for special purposes in almost any color of the rainbow. Add special colors to a mix of other flowers, or create a unique blend of personalized colors.
Please ensure you understand that once the flowers are removed from the coloring, they will begin to lighten back to their natural color. This product is best for an impact statement, not a long term arrangement, unless you plan to keep the flowers in colored water.
GENDER REVEAL
Flowers are a fun way to announce the gender of your new baby! We provide white flowers and properly colored water in a solid, non-transparent vase. The flowers will soak up the color and begin to change, revealing the chosen color. This can be completed with white flowers only, or included in a arrangement with mixed flowers. Directions and average time until color appears are included, and vary with different flowers.

BULK / WEDDING SEEDS
Looking for a wedding favor that will keep on giving? Want to 'go green' and toss seeds instead of rice? We can accommodate bulk seeds for various events.
Our Team
hotopgraphy senior pictures. baby gender announcement. bridal shots.
Who We Are
Mexican Petunias (Rooted)
Mexican Petunias (Rooted)
Mexican Petunias (Rooted)
MEXICAN PETUNIA CUTTINGS
SPRING BULBS
Spring Bulbs Include; ________
These bulbs need a cool period to break out of dormancy, so these need to be planted in the fall, after it begins to cool down.
Plant After First Frost
Planting Depth
Enjoy in the Spring
Our Expertise
Mexican Petunias (Rooted)
Mexican Petunias (Rooted)
GUIDANCE FOR FLOWER SEEDS
FLOWER SEED BASICS
Flower seeds all have unique directions for best germination. Details are below for various seeds from Laura's Lilies. Let's review some definitions.
Lifespan: Annual plants will grow for the season, and will not return. Some may self-sow, but the original plant has expired. Perennial plants s
GUIDANCE FOR FLOWER SEEDS
FLOWER SEED BASICS
Flower seeds all have unique directions for best germination. Details are below for various seeds from Laura's Lilies. Let's review some definitions.
Lifespan: Annual plants will grow for the season, and will not return. Some may self-sow, but the original plant has expired. Perennial plants should come back each year with proper care. They may also spread through underground roots or self-sowing.
Light: This describes the best location for the plants to thrive, as far as sunshine. Full sun is 6 or more hours of sun each day, partial sun is 3 to 6 hours of sun each day, and shade is less then 3 hours of sun each day.
Indoor Germinating Start: This is the recommended time to germinate the seeds indoors. Do this using peat pellets or other soil, planting at the recommended depth, and keeping moist with good light. This gives your plant a head start for the season. Harden off & plant outdoors after last frost date.
Germination Time: This is how long is normally takes for the seeds to germinate under good conditions. This generally means 70-80 degrees Fahrenheit. Cooler temperature usually slow down germination time.
Outdoor Seed Planting: This is the recommended time to plant the seeds if you are direct sowing them outdoors.
Depth: Plant the seeds at this depth for their best chance of germination and survival.
Spacing: This is the recommended spacing to give the plants adequate room to grow properly.
Succession Planting means staggering the plantings to extend the bloom/harvest season.
It is important to you know your last frost date, as many of the seed instructions are based off of that date. Check below if you are unsure of your date.
LAURA'S LILIES BLENDS
Lifespan:
Light:
Indoor Germinating Start:
Germination Time:
Outdoor Seed Planting:
Depth:
Spacing:
BACHELOR BUTTONS
Lifespan: Annual
Light: Full Sun
Indoor Germinating Start: 4-6 Weeks Before Last Frost Date
Germination Time: 7-14 Days
Outdoor Seed Planting: (Recommended) 1-2 Weeks Before Last Frost Date
Depth: 1/4 Inch
Spacing: 9 Inches
BALLOON FLOWERS
Lifespan: Perennial
Light: Full Sun to Partial Sun
Indoor Germinating Start: 6-8 Weeks Before Last Frost Date
Germination Time: 21-30 Days
Outdoor Seed Planting: After Last Frost Date
Depth: 0 Inches (Surface)
- This seed needs light to germinate
Spacing: 12 Inches
CELOSIA
Lifespan: Annual
Light: Full Sun
Indoor Germinating Start: (Recommended) 6-8 Weeks Before Last Frost Date
Germination Time: 8-14 Days
Outdoor Seed Planting: After Last Frost Date
Not Recommended with Short Growing Seasons
Depth: 1/8 Inch
Spacing: 8 Inches
COSMOS
Lifespan:
Light:
Indoor Germinating Start: 5-7 Weeks Before Last Frost Date
Germination Time: 7-10 Days
Outdoor Seed Planting:
Depth:
Spacing:
ECHINACEA (CONEFLOWER)
Lifespan:
Light:
Indoor Germinating Start:
Germination Time:
Outdoor Seed Planting:
Depth:
Spacing:
GOMPHRENA
Lifespan:
Light:
Indoor Germinating Start:
Germination Time:
Outdoor Seed Planting:
Depth:
Spacing:
MARIGOLD
Lifespan:
Light:
Indoor Germinating Start:
Germination Time:
Outdoor Seed Planting:
Depth:
Spacing:
MILKWEED
Lifespan: Perennial
Light: Full Sun
Indoor Germinating Start: 4-8 Weeks Before Last Frost Date
Germination Time: 7-10 Days
Outdoor Seed Planting: Late Fall, After a Few Frosts
Depth: 1/4 Inch
Spacing: 18-24 Inches
Note: Milkweed Readily Self Sows and Floats with Dandelion-Like Fluff
To Control Invasion, Remove Seed Pods Prior to Maturing
Note: Milkweed Seeds Must be Cold Stratified Before Planting Indoors
OBIDIENT PLANT
Lifespan: Perennial
Light: Full Sun to Partial Sun
Indoor Germinating Start: 6-8 Weeks Before Last Frost Date
Germination Time: 7-10 Days
Outdoor Seed Planting: Late Fall, After a Few Frosts
Depth: 1/4 Inch
Spacing: 18-24 Inches
Note: Keep Seeds in Refrigerator for 60 Days Prior to Planting Indoors to Simulate Winter Conditions
ORNAMENTAL GRASS - BUNNY TAILS
Lifespan: Annual
Light: Full Sun
Indoor Germinating Start: 5-7 Weeks Before Last Frost Date
Germination Time: 10-14 Days
Outdoor Seed Planting: After Last Frost Date
Not Recommended with Short Growing Seasons
Depth: 1/8 Inch
Spacing: 12 Inches
STRAWFLOWERS
Lifespan: Annual
Light: Full Sun
Indoor Germinating Start: 4-6 Weeks Before Last Frost Date
Germination Time: 7-10 Days
Outdoor Seed Planting: After Last Frost Date
Depth: 0 Inches (Surface)
- This seed needs light to germinate
Spacing: 12 Inches
TITHONIA (MEXICAN SUNFLOWERS)
Lifespan: Annual
Light: Full Sun
Indoor Germinating Start: 6 Weeks Before Last Frost Date
Germination Time: 7-14 Days
Outdoor Seed Planting: (Recommended) After Last Frost Date
Depth: 0 Inches (Surface)
- This seed needs light to germinate
Spacing: 18 Inches
VIOLA
Lifespan: Annual - Self Sows Readily
Light: Sun to Partial Sun
Indoor Germinating Start: 8 Weeks Before Transplant Date
Germination Time: 4-7 Days
Outdoor Seed Planting: Not Recommended
Depth: 1/8 Inch
Spacing: 6 Inches
Note: Violas are Cool Temperature Flowers and Tolerate a Light Frost
They dislike the heat of the summers
Plant According to Desired Bloom Time (1-2 Weeks After Transplant)
ZINNIA
Our Services
Mexican Petunias (Rooted)
Our Services
FLOWER SEEDS
Master seed germination with instructions on sprouting your flowers. This includes flowers, ornamental grasses, and our special Laura's Lilies seed blends.
Our Vision
Mexican Petunias (Rooted)
Our Services
WE APPRECIATE YOUR BUSINESS & SUPPORT
Laura's Lilies doesn't just sell products, we give you the tools to be successful with them.
Scroll down to learn more about your newest purchase.
GUIDANCE FOR FRESH CUT & DRIED FLOWERS
BRINGING BOUQUETS HOME
Many flowers can last a bit of time out of water, but you want to minimize it and hydrate them
WE APPRECIATE YOUR BUSINESS & SUPPORT
Laura's Lilies doesn't just sell products, we give you the tools to be successful with them.
Scroll down to learn more about your newest purchase.
GUIDANCE FOR FRESH CUT & DRIED FLOWERS
BRINGING BOUQUETS HOME
Many flowers can last a bit of time out of water, but you want to minimize it and hydrate them again as soon as possible. Flowers will suck water through their stems like a straw. After being out of water for a while, trim the end with sharp shears to open up the fresh veins which may have 'callused over' from drying out. You only need to cut a half inch to be effective. Also, make sure to cut at a 45 degree angle to maximize the surface area available to absorb water. Of course, place the stems in water immediately, and even cut under running water if possible. For most flowers , warm room temperature is best. Don't forget to cut off any remaining leaves below the water line, these will rot and create dirty water for your floral beauties, and can contribute to dehydration and shorter vase life.
FLOWER ARRANGING
Arranging your flowers does have somewhat of an art to it, but first we need to prepare the 'canvas.' Before working with the stems, prepare your vase with room temperature water, and flower food. These usually come in small packets, but you can always try our own recipe. Mix according to the packet and use the right ratio of water.
After we have the vase prepared, we can being creating our arrangement. After being out of water for a while, trim the end with sharp shears to open up the fresh veins which may have 'callused over' from drying out. You only need to cut a half inch to be effective. Also, make sure to cut at a 45 degree angle to maximize the surface area available to absorb water. Of course, place the stems in water immediately, and even cut under running water if possible. Don't forget to cut off any remaining leaves below the water line, these will rot and create dirty water for your floral beauties.
The next step is to decide how you want to arrange your flowers. Do you want a vase which will be placed against the wall, or one with a 360 degree view? Keep this in mind as you place the stems. Here are a few florist theories to help you create your masterpiece;
- Balance & Spacing: Ensure to balance the flowers on each/all side(s) of your center point, and spread similar flowers (varieties or colors) out from each other.
- Proportion: Make sure your flower size and stem length goes well with the vase. This is also a recommendation for placing vases through a home/office/etc. Big spaces need big arrangements or they can get lost in the room.
- Pattern & Rule of 3: Use 3 (or an odd number) of each variety to create a full and balanced look. Spread the flowers out through the viewing plane.
- Thrillers, Spillers & Fillers: Use thrillers as your focal flowers, these are the bigger or brighter flowers. Use spillers to fill the bottom area of your arrangement space. Finalize with fillers to allow space between your thrillers.
PRE-MADE ARRANGMENTS
These arrangements are easy, and already 'designed' for you. We suggest you bring them home and let them adjust to their new environment for a few hours. At some point, before heading to bed, mix up for your flower food and some fresh water for your stems.
Simply follow the tips for longer vase life below, and enjoy your flowers.
LONGER VASE LIFE
Fresh cut flowers, frequent water changes, and flower food are the basics of long vase life. Your flowers will likely last 3-5 days with no care, but with proper care could double and triple that, with a vase life of up to 2 weeks. Here are some other tips on maximizing your flowers;
- Keep them away from direct sunlight.
Flowers may like the sun when growing, but after harvesting, it is best to keep them shaded.
- Avoid drafts and breezes.
Air flow is great for preventing mold and bacteria in the field, but drafts and constant air flow after harvesting is hard on the stems.
- Maintain cool temperatures.
Most flowers will last longer in cooler environments once cut. You can even put them in the fridge at night or when at work to preserve them as long as possible. Just be careful to avoid the fridge for a few special flowers like zinnias, celosia and balloon flowers.
- Recut stems.
Even in water, stems may callus over. Recut them when you change the water and let them get a good drink. Cut just a bit off the bottom, a half inch should do, and cut at a 45 degree angle to maximize the surface area for water absorption. Remember to trim any leaves that may be below the water line to keep the water clean.
- Remove spent flowers.
Various flowers will not last as long as others once harvested. This is natural. When flowers fade, they are no longer beneficial to your arrangement, aesthetically or via cleanliness. Pull them out to keep things looking good and prevent any bacteria rot in the water which could affect the other flowers.
- Keep away from fruit.
Fruits often release a gas called ethylene which can cause flowers to age more rapidly. Keep your fruit and flowers in separate areas to maximize vase life.
DRIED FLOWER PRESERVATION
Who knew hair products would be the best answer for preserving dried flowers? Here's how to use them;
Once you receive and arrange your dried flowers, hair spray is helpful to maintain color and increase durability. Use an aerosol version and spray lightly at several angles in small bursts. Avoid any dripping and let bursts dry between sprays as needed.
After some time, dried flowers may gather some dust. Grab a hairdryer and set on the coolest setting, with the lowest air flow. Blow the flowers at several angles moving constantly to shake off and remove dust.
Who We Are
Mexican Petunias (Rooted)
Mexican Petunias (Rooted)
Mexican Petunias (Rooted)
FRESH CUT AND DRIED FLOWERS
Learn how to maximize your farm fresh cut flowers & care for your dried flowers. This includes bouquets, arrangements, you-pick flowers, and all dried products.
Our Expertise
Mexican Petunias (Rooted)
Mexican Petunias (Rooted)
LIVE & DORMANT PLANTS
Our Services
Mexican Petunias (Rooted)
Our Services
FLOWER SEEDS
Our Vision
Mexican Petunias (Rooted)
Our Services
SPECIALTY AND PROMOTIONAL PRODUCTS
Check out details on the use and care of specialty and promotional items.
SPECIALTY & PROMOTIONAL PRODUCT USE
OTHER LAURA'S LILIES PRODUCTS
We haven't left these items out; here is the information on everything else!
Who We Are
Mexican Petunias (Rooted)
Mexican Petunias (Rooted)
Mexican Petunias (Rooted)
Mexican Petunias (purple, pink & white) are quite easy to grow, they just need a minute to get established.
Upon receiving your plants, remove them from the Ziploc bag right away. Place them in a cup of water, covering the roots and ensuring the leaves remain dry and out of the water.
After your last frost date, place the cuttings in the
Mexican Petunias (purple, pink & white) are quite easy to grow, they just need a minute to get established.
Upon receiving your plants, remove them from the Ziploc bag right away. Place them in a cup of water, covering the roots and ensuring the leaves remain dry and out of the water.
After your last frost date, place the cuttings in the ground. Dig a hole a few inches deep in a sunny location, and back fill with soil. Press the soil down lightly to ensure good contact and plant support. A partially shady location will be suitable, but the more sun the plant gets, the more flowers you will see! Water the plants well, especially the first few days, continuing to water daily until you see new growth. New growth will occur not only in plant height and leaves, but additional stems will emerge.
As the plants get established, they will need less and less attention. Water during droughts and in extreme temperatures, or if they begin to wilt. No fertilizer is needed. They are tolerant of flood, drought, and many soil types.
The plants die off in cooler months, and they can be cut to the ground to remove the unsightly remains. They will come back in the spring in warmer zones (Zone 8 and below) with additional, stronger stems.
Our Expertise
Mexican Petunias (Rooted)
Mexican Petunias (Rooted)
These garden markers are the last ones you will need to buy. We use them for all of our labeled plants. You can write on them with pencil, crayon, nursery marker, paint pen, or grease pen, but we recommend labels (Brother P-Touch Labels) for a long term solution. Simply label the plant in whichever way you choose, and stick the double po
These garden markers are the last ones you will need to buy. We use them for all of our labeled plants. You can write on them with pencil, crayon, nursery marker, paint pen, or grease pen, but we recommend labels (Brother P-Touch Labels) for a long term solution. Simply label the plant in whichever way you choose, and stick the double posts several inches in the ground to remember exactly what you put beneath that soil.
Our Services
Mexican Petunias (Rooted)
Our Services
EARRINGS
We don't have much direction on what to do with your earrings, but here is some general guidance on what not to do to keep your jewelry clean and shiny!
The S's to Avoid for Proper Jewelry Care
Showers / Soaps / Scrubs
Sprays
Soil / Sun / Sunscreen
Sweat / Swimming
Sleep
Sports
SUGAR SCRUBS
These sugar scrubs are a treat for rough hands!
W
EARRINGS
We don't have much direction on what to do with your earrings, but here is some general guidance on what not to do to keep your jewelry clean and shiny!
The S's to Avoid for Proper Jewelry Care
Showers / Soaps / Scrubs
Sprays
Soil / Sun / Sunscreen
Sweat / Swimming
Sleep
Sports
SUGAR SCRUBS
These sugar scrubs are a treat for rough hands!
We recommend you wet your hands a bit to help spread the scrub around. Then, with your fingers, scoop a small amount out of your jar. Massage around your hands and fingers, even up to your wrists. Try them on your feet too! We do not recommend using these on your face or lips as the exfoliating properties are quite strong. When complete, just rinse off and you will be left with sweet smelling, smooth hands, or feet!
Our Vision
Mexican Petunias (Rooted)
Our Services
Our vision at Fire Tower Flowers is to be the most reliable and trusted flower delivery service provider in the industry. We strive to provide a seamless and enjoyable experience to our customers by offering exceptional quality, creativity, and customer service. We believe in spreading happiness and joy through our beautiful floral arrangements.